


How to Clean your Aga Range Cooker

> More info about our Aga cleaning and refurbishment service
None of the instructions below on how to clean your Aga range cooker are rocket science but hopefully they will be useful. It will likely take you an hour or two and definitely involve some elbow grease but the results will be worth it. We've used this technique for a decade now as part of the services we offer to Aga range cooker owners!
We also have a handy infographic on this topic, so feel free to check this out if you are more of a visual person!
Once you are done do have a look at our DIY refurbishment kits.
To complete the instructions you will need the bits and bobs below. If you have it all that is great but if not our cleaning kits are here; they come with a printed version of the guide and all the kit.
- Scraper with interchangeable heavy duty blades (supplied with our kit), our blades are heavy duty and very high quality. Avoid thin, unbranded, blades as they snap easily which is dangerous and become blunt and scratch almost instantly.
- Steel wool ball (supplied with our kit).
- Cleaning paste (supplied with our kit).
- Microfibre cloth (supplied with our kit).
- Sponge scourer (supplied with our kit).
- Safety goggles.
- Vacuum cleaner (or dustpan and brush).
- Wiping up cloth.
The first thing you need to know is that enamel is a lot tougher than you think it is. Some people would have you believe that merely breathing on your cooker will cause it to spontaneously collapse into dust; not true!
It’s possible you still don’t believe me (the horror!) so if you want to be convinced try running through the instructions below on a hidden section like the side of the hob or behind the bottom of the control panel door; the proof is in the pudding.
I have used the verb to ‘scrape’ below a lot; it is purely because I cannot think of a better one! The only thing you’ll be scraping is the grease and burnt on muck don’t worry, the enamel will be fine!

Hot or cold?...
There are two sets of instructions, one for hot Aga range cookers and one for cold. Cold works best, follow the ‘hot’ instructions in between cold cleans - they are more of a ‘top-up’.
No need to turn off for days. Most efficient is to turn off after making supper one evening. Leave the doors and lids open and pop your largest pans of cold water on the hob until you go to bed.
By morning it will be perfect cleaning temperature. Do the job first thing and then turn back on. Most cookers will be ready for the evening meal but if not a fish and chip supper is never a bad thing!
Before you get started read the notes below carefully.
Cold cooker? Lets get going…
- The first piece of kit we need is your scraper. I hope I don’t need to tell you to be careful with razor blades but these are super sharp so concentrate! Pop one of the blades into the end by pushing the button on the scraper up and out slightly and sliding the blade in. Click it back into place.
- Remove the hotplate expansion rings from around the hotplates (lever up gently with screwdriver if necessary), and remove the doors by lifting them straight up VERY carefully (don’t drop ‘em)! Place them enamel up on a soft towel.
- (Make sure safety goggles are on from now) Place the blade flat against the enamel at the front between the hotplates and scrape slowly towards the hotplate. Use as much pressure as you need. Work your way around all flat enamel on the hob, lid rims, front and doors. The muck will lift in a thin film or in jagged clumps if dried and thick. For corners and joins (like that between the hob and hinge block) use the corner of the blade. If you chip or break the blade then swap it for a new one, do the same when the blade stops working as well, it’s getting blunt! See ‘note 1’ below.
- Vacuum or brush off the collection of burnt muck you have now created.
- We have not finished with the blade yet! Use a fresh blade and clean up any bits you have missed (easy to do when it’s all lying around). Also pay attention to edges and corners like the hinge blocks, around the spring handles and door hinges, it takes awhile but works effectively.
- Vacuum or brush up again - a tidy workplace is a successful one!
- When you have done as thorough job as possible of ‘scraping’ it’s time to move on to the next broad stage. You’ll need your Astonish paste, a sponge scourer, the wire wool plus some warm water.
- Take your sponge scourer and get plenty of warm water on it. Use it to scoop up a lovely big chunk of Astonish paste (as always don’t worry, it’s approved for use by The Vitreous Enamel Society) and spread it liberally around the enamel surfaces of your range cooker. It’s easier and less messy to do a section at a time, like one lid then the next then the hob etc. If your cooker is still warm you’ll need to use lots of water, Astonish works best when wet.
- Now take your wire wool and work the Astonish paste around the enamel parts of your range cooker. Some areas will need a light scrub to lift the grease, others will need a lot of pressure to remove burnt on grease. Don’t be afraid of the wire wool on enamel with one exception, see ‘Note 2’ below.
- Wipe clean, assess the results and re-apply as necessary until you can go no further.
- When you have finished rinse the Astonish paste thoroughly from the cooker and wipe clean. Don’t do this half heartedly or when turned back on you’ll see a white dusty film. Not harmful and wipes off easy but better to rinse clean once than have to do it again!
- The final stage is to use your Microfibre cloth to polish the enamel. You should not need any sprays or solutions. If the cloth picks up any muck just rinse well under hot water, wring thoroughly, and continue. The Astonish picks up grease really well and the microfibres pick up the rest. The result should be a shiny and greasy streak free finish!
Optional extra jobs...
- Clean those gunky spring handles. Make them look lovely!
- Replace door hinge washers. Reduce the heat transferred into your doors via the hinge and make your range cooker a little more efficient!
- Replace chrome hob caps. Remove, clean and replace to recreate the eye catching shininess of your original hob caps!
- Clean your range cooker's flue shroud, no scrubbing required! These really collect the dust, this is a simple way to keep on top of it!
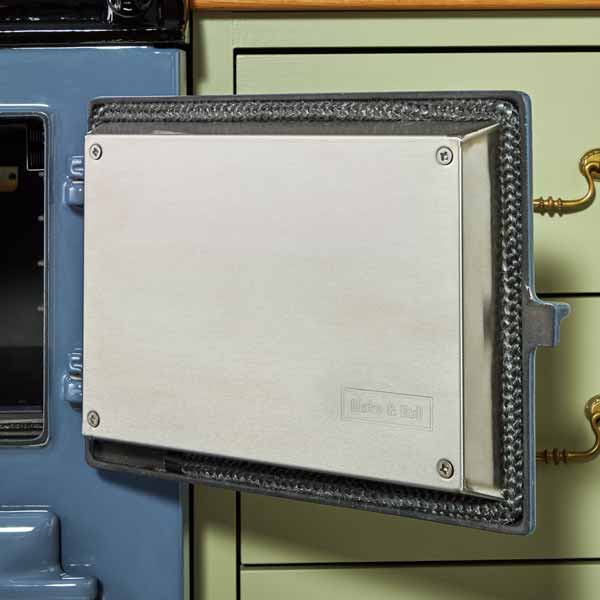
- Replace your thermometer plate - the small thing that makes a BIG difference!
- Give your range cooker a good scrub - very much worth a small investment of time this one!
- Once scrubbed touch up those chips to the enamel!
- Make your Aga range cooker badge look smarter if the paint has chipped off or melted.

Cold Aga range cooker notes…
- If your cooker is really bad certain areas will defeat the scraper and blades, usually between the hotplates and below the hotplate rings. Perseverance will usually do the trick but if not finish the bits you can clean neatly against the bits you cannot and leave it be (you might need our help)! Concentrate on the bits you can improve. This will usually only be the case on 30+ year old cookers.
- The front’s can suffer acid damage from previous cooking spills (like lemon juice, fruit acids or even tomato juice) or from previous use of the wrong cleaners like the dreaded Cillit Bang. This looks like a whiteish water mark, usually running down the front of the cooker in streaks. See these images on Facebook sent in by a customer. Do not use wire wool on these areas. The surface glaze of the enamel has been damaged by the acid and in some cases, not all though, you’ll reveal the extent of the damage by scrubbing. Sometimes it’s even better to not clean it at all! Experiment with a small patch to assess what the best plan is with these areas, always happy to chat if you are unsure.
Hot cooker? Try this…
This is a method of cleaning up specific spills in between big cleans when the cooker is off, don’t expect miracles!
- Use your scraper with a fresh blade to remove the worst of the spill/muck
- Use a clean and dry wire wool (see ‘Note 1’ below) and ‘buff’ over the area to turn any remaining materials to dust.
- Sweep this dust off the surface quickly with your microfibre cloth and then polish to finish.

Hot cooker notes…
- To clean and dry your wire wool after a cold clean pop it through your dishwasher and then dry it in the simmering oven.
- The key with a hot cooker is not to use any moisture or sprays - they only dry instantly and create streaks! Keep everything dry and individual spills are easy to clean up!
Disclaimer…
I’ve used these methods (and tougher) to clean Aga range cookers for 10 years now and they work brilliantly.
That said if you manage to damage your cooker somehow doing this then I cannot take responsibility!
Test on small hidden areas if you are not convinced and if in doubt give me a call. If you’ve bought the kit and changed your mind don’t panic you can return your kit unused for a full refund!
>> Ready to get scrubbing? Our cleaning kits are here; they come with a full printed version of the guide and all the products you'll need!
>> Decided you'd like the pros to have a go instead? Blake & Bull offer a comprehensive refurb and cleaning service as well as re-enamelling and electric conversions.